

The Science Behind Wrinkles and Fabric Care
Understanding the science of wrinkles is the first step. Many people see wrinkles as a nuisance. However, they are actually a result of chemistry. Fabrics consist of long polymer chains. These chains are held together by hydrogen bonds. When you wear a shirt, your body heat and moisture affect these bonds. Consequently, the chains shift and lock into new positions. This creates the wrinkles you see. Therefore, learning how to iron a shirt is essentially reversing this chemical process.
Heat and moisture are the key elements. The iron provides the necessary heat. Simultaneously, steam or dampness introduces water molecules. This combination breaks the hydrogen bonds again. As a result, the polymer chains become mobile. The weight of the iron then flattens the fabric. It forces the chains back into a straight alignment. When the fabric cools down, the bonds reform. Consequently, the shirt holds its smooth shape.
Different fabrics react differently. Cotton is very prone to wrinkling. This is because it has many hydrogen bonds. Polyester, on the other hand, is more resilient. It has a different molecular structure. Therefore, it often requires less heat. Furthermore, the weave of the fabric matters. A tight weave is harder to iron. A loose weave is more forgiving. You must understand these differences.
Moreover, the concept of “glass transition temperature” is relevant. This is the temperature where fibers become soft. You must reach this temperature to remove wrinkles. However, you must not exceed the melting point. If the iron is too hot, you can melt the fibers. This causes permanent shine or damage. Thus, temperature control is vital. In summary, ironing is applied chemistry. You are manipulating the fabric’s molecular structure. By understanding this, you can achieve better results.
Essential Tools for a Perfect Finish
How to iron a shirt? You cannot do a good job without the right tools. A high-quality iron is the most important investment. You should look for one with variable steam settings. It should also have a non-stick soleplate. A stainless steel or ceramic soleplate glides smoothly. Consequently, it reduces friction. This prevents snagging on delicate fabrics. Furthermore, check the water tank capacity. A larger tank means fewer refills. This saves you time.
The ironing board is equally critical. It provides the necessary surface. A sturdy board prevents wobbling. Safety is paramount here. Additionally, the cover of the board matters. It should be heat reflective. This reflects heat back into the garment. As a result, you iron both sides at once. This makes the process faster. You might also consider a narrow board tip. This helps with sleeves and shoulders.
Distilled water is a secret weapon. You should use it in your iron. Tap water contains minerals. These minerals can build up inside the iron. They can clog the steam vents. Eventually, they might spit out dirty water. This stains your clothes. Therefore, distilled water protects your appliance. It also protects your garments.
Other accessories can help. A spray bottle is useful for stubborn wrinkles. You can dampen the fabric before ironing. Additionally, a pressing cloth is essential. It protects delicate fabrics from direct heat. You can use a clean cotton cloth or a handkerchief. Finally, a hanger is necessary. You should hang the shirt immediately after ironing. This prevents new wrinkles from forming. In conclusion, the right tools make the task easier and faster.
Preparing Your Garment and Workspace
Preparation is the key to efficiency. You should never try to iron a dirty shirt. The heat can set stains permanently. Therefore, always ensure the shirt is clean. Also, check for any spots. If you see a stain, wash the shirt again. Furthermore, the shirt should be slightly damp. This is the ideal state for ironing. The moisture helps break the bonds. If the shirt is dry, use a spray bottle. Alternatively, you can put it in the dryer for a few minutes.
Next, set up your workspace. Ensure the room has good lighting. You need to see the wrinkles clearly. Shadows can hide creases. Consequently, you might miss spots. Place the ironing board at a comfortable height. You should not have to bend over. Bending causes back pain. It also makes you tire quickly. Therefore, adjust the height to your waist level.
Check the garment label. This small tag provides crucial information. It tells you the fabric content. It also suggests the maximum heat. Ignoring this label can ruin your shirt. For example, silk requires low heat. Linen requires high heat. Synthetics need a low to medium setting. Once you know the fabric, set your iron. Let it heat up fully. An iron that is not hot enough will not work well.
Finally, organize your tools. Place the spray bottle nearby. Have your hangers ready. Clear the area around the board. You need space to move the shirt around. If you are ironing multiple shirts, sort them. Start with the items requiring the lowest heat. Work your way up to high heat. This prevents scorching delicate fabrics. By preparing well, you streamline the entire process.
Mastering the Process: How to Iron a Shirt Step by Step
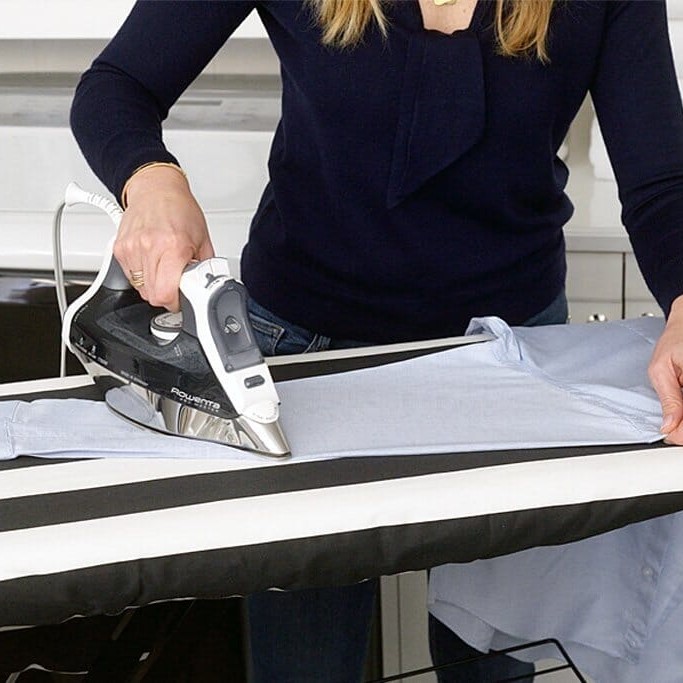
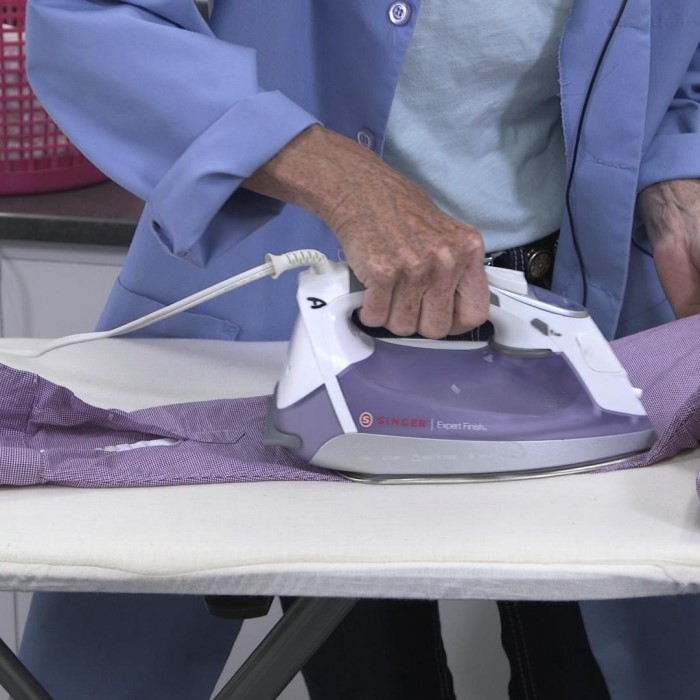
Many people ask how to iron a shirt step by step? The process has a logical order. You should start with the stiff areas first. This prevents new wrinkles on flat parts. Consequently, begin with the collar. Lay the collar flat on the board. Iron the underside first. Then, iron the top side. Use the tip of the iron for the edges. Do not iron over the buttons. They can break or melt.
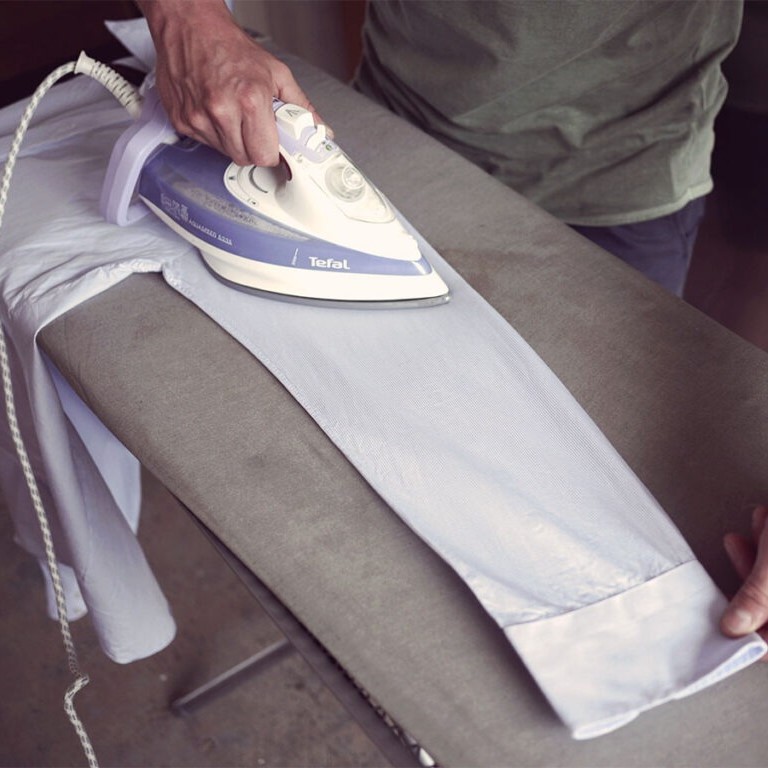
Next, move to the cuffs. Similar to the collar, iron the inside first. Unbutton the cuff to lay it flat. Iron around the buttons carefully. After the cuffs, tackle the sleeves. This is often the hardest part. Lay one sleeve flat on the board. Smooth out any wrinkles with your hand. Iron from the cuff to the shoulder. Avoid creating a crease on the top edge unless you want one. Repeat this for the other sleeve.
Then, iron the yoke. This is the panel across the shoulders. It has a unique shape. Fit it over the narrow end of the board. Iron from one shoulder seam to the other. This ensures a smooth back. Finally, iron the body of the shirt. Start with the front panels. Iron around the buttons carefully. Then, move to the back panel. Slip the shirt over the board’s end. This allows you to iron large sections smoothly.
Once finished, hang the shirt immediately. Button the top button to hold its shape. Do not crowd it in the closet. Let it cool down completely. This sets the fibers. If you wear it immediately, it might wrinkle again. In summary, follow this order: collar, cuffs, sleeves, yoke, and body. This systematic approach ensures a crisp result every time.
Troubleshooting Common Ironing Issues
Even with practice, problems can arise. You might wonder, why do my clothes still look wrinkled after ironing? There are several reasons for this. The most common cause is insufficient heat. If the iron is not hot enough, the bonds do not break. Consequently, the wrinkles remain. You need to match the heat to the fabric. Another reason is lack of moisture. Dry heat is often ineffective on cotton. You need steam or a spray bottle. The water helps relax the fibers.
Another issue is “shiny” marks. These often appear on dark fabrics. They are caused by pressing too hard. Or, the iron might be too hot. The sheen is actually flattened fibers. To avoid this, use a pressing cloth. Also, iron on the wrong side of the fabric. This protects the surface. Furthermore, check your iron’s soleplate. A dirty soleplate can leave marks. Clean it regularly with a damp cloth.
Sometimes, you might see water spots. This happens if the iron leaks. It could be because you used tap water. Or, you might have overfilled the tank. To fix this, use distilled water. Also, do not store the iron with water in it. Empty the tank after every use. This prevents mineral buildup.
Finally, stubborn creases can be annoying. These are lines that refuse to go away. They often occur on sleeves. To remove them, use a burst of steam. Alternatively, dampen the area specifically. Then, pull the fabric taut. Iron over it firmly. You might need to repeat this a few times. Remember, patience is key. Do not rush the process. If a wrinkle does not come out, wait. Let the fabric cool. Then, try again with more steam.

Alternative Methods When You Lack an Iron
There are times when an iron is not available. You might be traveling. Or, your iron might be broken. In these cases, you need alternatives. People often ask how to iron a shirt without an iron at home? The shower method is very popular. Hang the shirt in the bathroom. Turn on the hot shower. Close the door and windows. The steam fills the room. It relaxes the fibers in the shirt. After about 10 minutes, the wrinkles will loosen. Then, pull the shirt taut to smooth it out.
Another method uses a hairdryer. This is a quick fix. Lay the shirt on a flat surface. Spray it lightly with water. Set the hairdryer to medium heat. Hold it a few inches away from the fabric. Blow the air over the wrinkled areas. Pull the fabric tight with your other hand. The combination of heat and tension removes wrinkles. However, be careful not to scorch the fabric.
You can also use a flat iron for hair. This is perfect for collars and cuffs. These areas are small and stiff. A hair straightener can clamp down on them. It provides direct heat and pressure. Consequently, it creates a crisp edge. Just make sure the flat iron is clean. Any hair product residue will stain the shirt.
Finally, a damp towel works well. Place the shirt on a bed or table. Put a damp towel over it. Press down firmly. The moisture transfers to the shirt. The weight flattens the fabric. Remove the towel and let the shirt air dry. These methods are not as perfect as ironing. However, they are effective in a pinch. They can save you from looking unkempt.
Quick Solutions for the Busy Professional
Time is often a luxury. You might be in a rush in the morning. You might ask, how to unwrinkle a shirt in 1 minute? Speed is the priority here. The fastest method is the dryer trick. Put the shirt in the dryer. Toss in a couple of ice cubes. Run the dryer on high heat for 5 to 10 minutes. The ice cubes create steam. This acts like a quick iron. Take the shirt out immediately. Shake it and put it on. Do not let it sit in the dryer, or wrinkles will return.
Another quick fix is a wrinkle-release spray. You can buy these at drugstores. Or, you can make your own. Mix water with a small amount of fabric softener. Spray the solution on the shirt. Pull the fabric gently to smooth it. Then, let it dry for a few minutes. The spray relaxes the fibers. It is very effective for light wrinkles.
If you only have a few wrinkles, use your body heat. Wear the shirt. The warmth of your body helps. Also, your movement stretches the fabric. This is not ideal for a formal meeting. But it works for casual situations. You can also dampen your hands. Run them over the wrinkled areas. Then, pull the fabric straight.
For collars, use your hands. If the collar is floppy, stiffen it. Rub a bar of soap on the inside. Then, iron it with a hairdryer. The soap acts as a starch. This trick takes seconds. These hacks are not for deep cleaning. They are for surface-level wrinkles. They help you look polished when you are pressed for time. Always prioritize proper ironing when you have the time.
Maintaining Your Equipment for Longevity
Your iron needs care too. Proper maintenance ensures it works efficiently. First, clean the soleplate regularly. Residue from fabric or starch can build up. This causes the iron to drag. It can also stain your clothes. You can buy specific iron cleaners. Or, use a paste of baking soda and water. Apply it to a cool iron. Wipe it off with a damp cloth. This keeps the surface smooth.
Second, manage the water tank. Never leave water in the iron when not in use. This promotes bacterial growth. It also leads to mineral deposits. Empty the tank after every session. Store the iron in an upright position. This prevents leaks. Furthermore, use the self-cleaning function if available. Most modern irons have this feature. It flushes out the internal vents.
Third, check the cord. A frayed cord is dangerous. It poses a fire risk. Ensure the cord is not twisted. Wrap it loosely around the iron for storage. Do not wrap it too tightly. This can damage the internal wires. Additionally, inspect the plug. It should fit snugly in the outlet.
Finally, protect your ironing board cover. It will eventually wear out. You can replace it cheaply. A fresh cover improves ironing efficiency. It provides better cushioning. Consequently, you get smoother results. Treat your tools well. They will serve you for years. A well-maintained iron performs better. It heats up faster. It produces consistent steam. This makes the chore of ironing much easier.
Conclusion
Ironing is more than just a chore. It is a skill that improves your appearance. A crisp shirt projects confidence and professionalism. We have explored the science behind wrinkles. We have discussed the essential tools. Furthermore, we have provided a step-by-step guide. You now know how to iron a shirt effectively. We also looked at alternatives for when you are in a rush. Whether you use a traditional iron or a shower steam, the goal is the same. You want to look your best. With practice, this task becomes second nature. You can enjoy the satisfaction of a perfectly pressed shirt. Take care of your clothes. They are an investment in your image.