
The Essential Role of a Drill Bit Sharpener in Modern Workshops
Every craftsman knows the frustration of a dull tool. You are working on a project. The drill bit slips. It creates a rough hole. It wastes time and energy. This is a common scenario in many workshops. However, it is easily preventable. The solution lies in maintaining your tools. Specifically, you need to keep your drill bits sharp. A sharp bit cuts cleaner and faster. It reduces the strain on your drill motor. Therefore, finding the best drill bit sharpener is a crucial task for any serious DIY enthusiast or professional. It transforms your workflow instantly. Instead of buying new bits constantly, you simply restore the old ones.
Furthermore, the economic benefits are undeniable. Drill bits are consumable items. They wear out over time. The friction of drilling creates heat. This heat dulls the cutting edge. If you throw away every dull bit, your costs accumulate quickly. High-quality drill bits are expensive. A good sharpener pays for itself in a short period. You extend the lifespan of your existing tools. You save trips to the hardware store. Consequently, you can allocate your budget to other essential equipment. This is a smart financial move for any workshop owner.
In addition, safety is a major factor. Many people overlook this aspect. A dull drill bit requires more force to penetrate the material. You have to push harder. This increases the risk of the bit slipping. If the bit slips, it can damage your workpiece.
Understanding the Mechanics of Drill Bit Sharpening
To choose the right tool, you must understand the process. Sharpening a drill bit is not just about grinding metal away. It is about geometry. A drill bit has two cutting lips. They must be symmetrical. They also have a specific angle. The most common angle is 118 degrees. This angle works well for general purposes. However, harder materials require a flatter angle, like 135 degrees. A good sharpener allows you to adjust these angles. It ensures that both cutting edges are equal in length. If they are uneven, the bit will wobble. The hole will be larger than intended. Therefore, precision is paramount.
Moreover, the point angle is not the only consideration. There is also the chisel edge. This is the web in the center of the bit. Modern sharpeners often split the point. This process thins the web. It creates a sharper center point. This allows the bit to start drilling without a pilot hole. It reduces the “walking” effect. This is a vital feature for metalworking. It improves the efficiency of the cut. Manual sharpening on a bench grinder is difficult. It requires a steady hand and years of practice. Most people struggle to get the geometry perfect every time. This is where a dedicated machine excels.
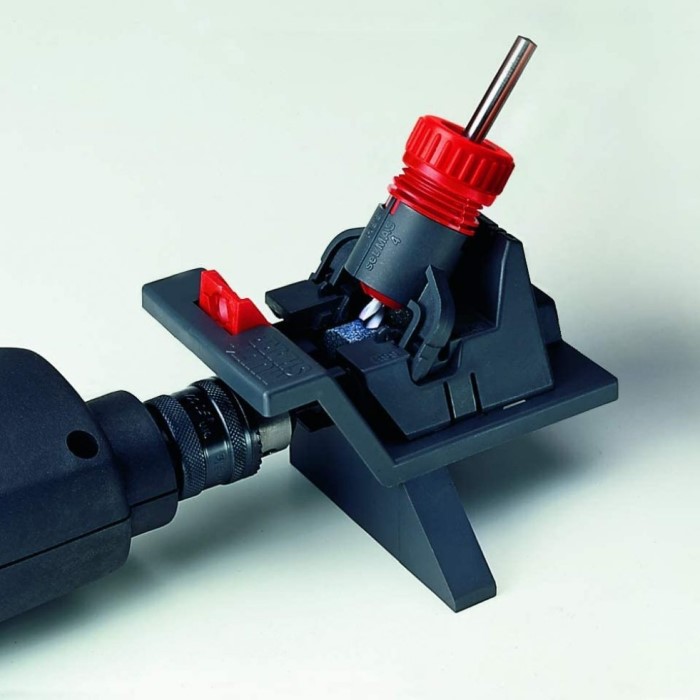
In addition, a dedicated sharpener removes the guesswork. It holds the bit in a precise alignment. It grinds the correct amount of material. Consequently, your drill bits perform like new. Some machines use a chuck to hold the bit. Others use a vee-block design. The chuck style is versatile.

Top Features to Look for in the Best Drill Bit Sharpener
The market in 2026 offers many choices. Not all sharpeners are created equal. You need to identify the features that matter. First, consider the grinding wheel material. Many machines use an aluminum oxide wheel. This is standard for high-speed steel (HSS) bits. However, if you work with cobalt or carbide bits, you need a diamond wheel. Diamond is much harder. It can grind these tough materials effectively. Therefore, check the specifications carefully. Ensure the sharpener can handle the types of bits you use most. Some models come with interchangeable wheels. This adds versatility.
Furthermore, look for adjustability. The ability to change the point angle is essential. As mentioned earlier, 118 degrees is standard. But you might need 135 degrees for steel. A good sharpener will offer a range of angles. Typically, this range is between 115 and 140 degrees. Some advanced models even allow you to adjust the relief angle. This is the angle behind the cutting lip. It affects how aggressively the bit cuts. Having control over these settings makes the tool much more valuable. It turns a simple sharpener into a precision instrument.
In addition, consider the ease of use. Some machines are automatic. You insert the bit and turn a handle. The machine does the work. Others require more manual input. You might need to rotate the bit by hand. The learning curve varies. If you are a beginner, an automatic model might be better.
Comparing Different Types of Sharpening Systems
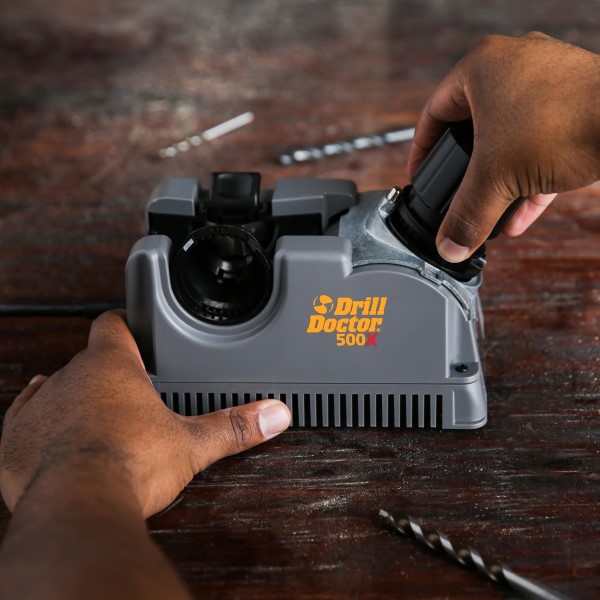
There are several categories of sharpeners available. Each has its pros and cons. The most common type is the dedicated drill doctor. These machines are designed specifically for twist drill bits. They are compact. They sit on your workbench. Consequently, they are the most popular choice for homeowners and contractors alike. They remove the skill required for freehand sharpening.
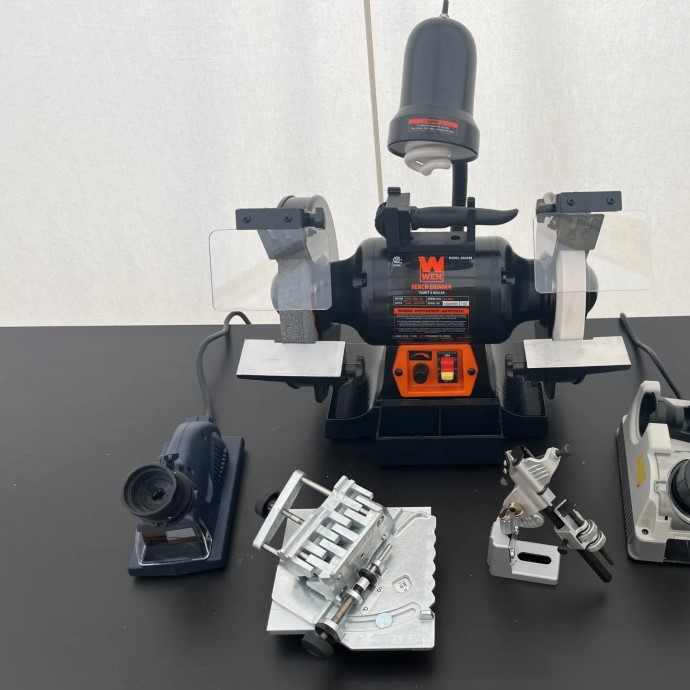
Another option is the bench grinder attachment. You might already own a bench grinder. You can buy an attachment that mounts to it. These attachments are generally cheaper than standalone units. They hold the bit at the correct angle. You then present it to the grinding wheel. This is a cost-effective solution. However, it can be bulky. It requires setup time. The accuracy depends on the quality of your grinder. If your grinder vibrates, the edge will be rough. Therefore, this is a good option for those on a budget who already have a good grinder.
Furthermore, there are professional-grade machines. These are larger and more expensive. They are often used in industrial settings. They can handle a wider range of bit sizes. Some can sharpen bits up to an inch or larger. They often feature dual grinding wheels. They are built for heavy use. However, they might be overkill for a hobbyist. They take up more space. Finally, there are manual sharpening tools. These are small jigs that help you sharpen on a stone. They are portable. They require no electricity. But they do require skill and patience. You must choose the type that fits your workflow and budget.
Step-by-Step Guide to Using Your Sharpener
Once you have purchased your sharpener, you must use it correctly. The process is generally straightforward. However, following the steps ensures the best results. First, inspect the bit. Look for major damage. If the bit is chipped or broken, it might need to be ground back significantly. The sharpener can handle this. But you will remove more material. Clean the bit. Remove any rust or debris. This ensures the chuck holds the bit securely. Insert the bit into the holder. Align it according to the manufacturer’s instructions. Usually, you extend the bit a specific length.
Second, set the angle. Adjust the machine to the desired point angle. If you are unsure, start with 118 degrees. This is the standard for general drilling. Turn on the machine. Let the motor reach full speed. Slowly introduce the bit to the grinding wheel. Do not force it. Let the wheel do the work. Light pressure is better than heavy pressure. Heavy pressure creates heat. It can blue the steel and ruin the temper. You might hear a grinding sound. This is normal. After a few seconds, rotate the bit. Most machines have a cam handle. You pull or push this to rotate the bit against the wheel. This creates the relief angle.
Third, check your progress. Remove the bit. Look at the tip. Is it sharp? Are the edges even? You can run your finger lightly across the edge. Be careful not to cut yourself. It should feel sharp. You can test it on a piece of wood or scrap metal. It should cut without pressure. If it is still dull, repeat the process.
Maintaining Your Drill Bit Sharpener for Longevity
Your best drill bit sharpener is an investment. You want it to last for years. Proper maintenance is key. The most important component is the grinding wheel. Over time, the wheel will wear down. It might become clogged with metal particles. This is called glazing. A glazed wheel does not cut efficiently. It generates more heat. It can ruin your drill bits. Therefore, you need to dress the wheel. Dressing involves removing the outer layer of the wheel. You expose fresh, sharp abrasive grains. Many sharpeners come with a dressing tool. Use it regularly.
Furthermore, keep the machine clean. Grinding creates metal dust. This dust settles everywhere. It can get into the moving parts. It can clog the motor. Use a vacuum cleaner to remove dust after each use. You can also use compressed air. Blow out the chuck and the alignment guides. Metal dust is abrasive. It can wear out the plastic and metal parts of the machine. By keeping it clean, you maintain the accuracy of the tool. If the alignment guides get worn, your bits will be sharpened at the wrong angle.
In addition, check the electrical components. Ensure the cord is not frayed. Listen to the motor. If it sounds labored, it might need service. Store the machine in a dry place. Moisture causes rust. This is particularly important for the grinding wheel. A rusty wheel is ineffective. If your machine has replaceable parts, keep a spare grinding wheel on hand. This way, you are never out of commission. A well-maintained sharpener will serve you for decades. It ensures that every drill bit you own is always ready for action. It is a small effort for a big return in performance.
Common Mistakes to Avoid When Sharpening
Even with a good machine, mistakes can happen. Knowing what to avoid is helpful. One common mistake is overheating the bit. This happens when you apply too much pressure. Or, you hold the bit against the wheel too long. The metal turns blue or black. This indicates the temper has been lost. The bit becomes soft. It will dull almost immediately. It might even break. To avoid this, use light pressure. Dip the bit in water frequently. This keeps the temperature down. This is crucial for standard high-speed steel bits.
Another mistake is an uneven point angle. This occurs if the bit is not seated correctly in the chuck. One cutting lip will be longer than the other. The drill will cut an oversized hole. It will also vibrate excessively. To fix this, double-check your alignment. Ensure the bit is straight before you start grinding. Some machines have a stop point. Use it consistently. If you make a mistake, simply regrind the bit. You might have to shorten the bit slightly. But you can usually salvage it. Do not rush the setup process. Alignment is everything.
Furthermore, avoid neglecting the web. Many people grind the cutting lips. But they forget the chisel edge. A thick web requires more force to start drilling. It makes the bit walk. Modern sharpeners often address this automatically. They split the point. If your machine does not do this, you may need to manually thin the web.
Frequently Asked Questions About Drill Bit Sharpening
Many users have specific questions about this topic. Here are answers to some common queries.
What is the best way to sharpen drill bits?
The best way is using a dedicated drill bit sharpener. It ensures consistent angles and symmetry. Freehand sharpening on a bench grinder is possible. However, it requires significant skill and practice. A dedicated machine is safer and easier for most people.
Is there a drill bit sharpener?
Yes, there are many types of best drill bit sharpener. They range from small, affordable models for homeowners to large, professional machines. Brands like Drill Doctor and generic bench grinder attachments are widely available. They are designed to restore the exact geometry of the bit.
Does sharpening drill bits work?
Yes, sharpening works very effectively. It restores the cutting edge to its original state. A properly sharpened bit performs just like a new one. It saves money and reduces waste. It is an essential practice for anyone who uses drills frequently.
Does WD-40 help drill bits?
WD-40 is a lubricant and rust penetrant. It can help during the drilling process. It reduces friction and heat. However, it is not a sharpening fluid. You should not use it on the grinding wheel. For sharpening, you generally use a dry wheel or a specialized coolant.
Conclusion: Investing in Quality for Your Workshop
In conclusion, a dull drill bit is a hindrance. It slows you down. It produces poor work. Every workshop needs a reliable solution for dull bits. The best drill bit sharpener is not just a luxury item. It is a necessity. You no longer have to stop work to buy a new bit. You can simply sharpen the one you have. This saves time. It saves money. It boosts your overall productivity.
The technology in 2026 has made sharpening easier than ever. You do not need to be a master machinist. The machines available today are user-friendly. They are precise. They offer features that were once only available in industrial settings. From adjustable angles to automatic cycles, there is a model for every skill level. You can choose a compact unit for a home garage. Or, you can select a heavy-duty machine for a professional shop. The options are vast. But the goal remains the same. That goal is a sharp, efficient drill bit.
Therefore, do not let dull tools hold you back. Evaluate your needs. Consider the size of the bits you use. Think about the materials you drill. Read the reviews. Select a sharpener that fits your workflow. Making this investment is a step towards professional craftsmanship. Your tools define your work. Keep them in peak condition. You will see the difference in every hole you drill. Thank you for reading this guide. We hope it helps you make an informed decision for your workshop.