
Understanding Why Screws Strip
How to remove a stripped screw? Before solving the problem, you must understand the cause. Screws usually strip because of user error or tool quality. For instance, using the wrong size screwdriver is a primary culprit. If the bit is too small, it cannot grip the head properly. Consequently, the metal edges inside the head wear away. Similarly, a cheap screwdriver can cause damage. Low-quality steel bits slip easily under pressure. Another common cause involves the speed of the drill. Driving a screw too fast generates excessive heat. This heat can soften the metal head. Therefore, the driver slips and ruins the shape. Furthermore, old or rusty screws are prone to stripping. Rust creates friction that resists turning.
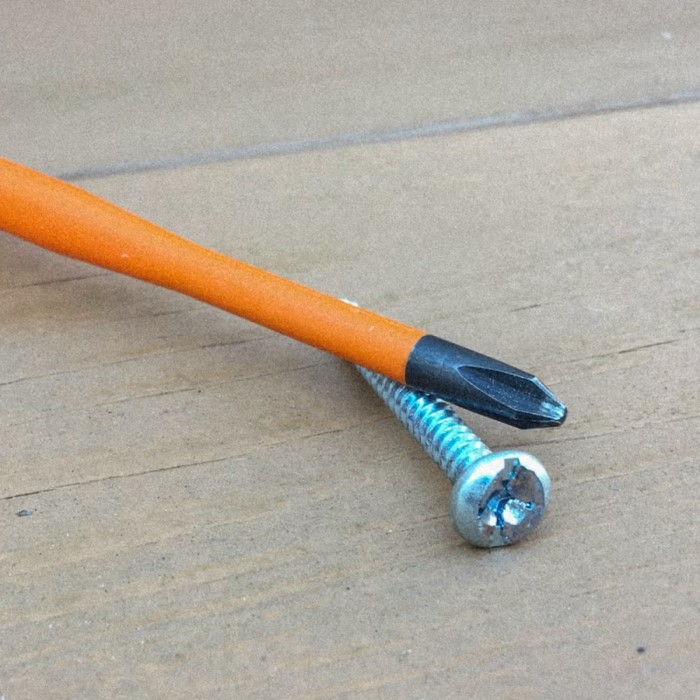
When you force it, the head gives way before the threads move. Understanding these causes helps you prevent future issues. You should always match your driver size perfectly to the screw head. Additionally, applying steady pressure is crucial. You must push hard into the screw while turning. This “axial” force keeps the bit seated. If you fail to apply enough pressure, the bit rides up. Then, it grinds away the interior of the head. Sometimes, the screw itself is defective. Cheap screws have soft metal heads. They strip with minimal torque. Recognizing these factors allows for better prevention. However, if the damage is already done, you need a solution. This guide focuses on those solutions.
The Rubber Band Trick for Mild Stripping
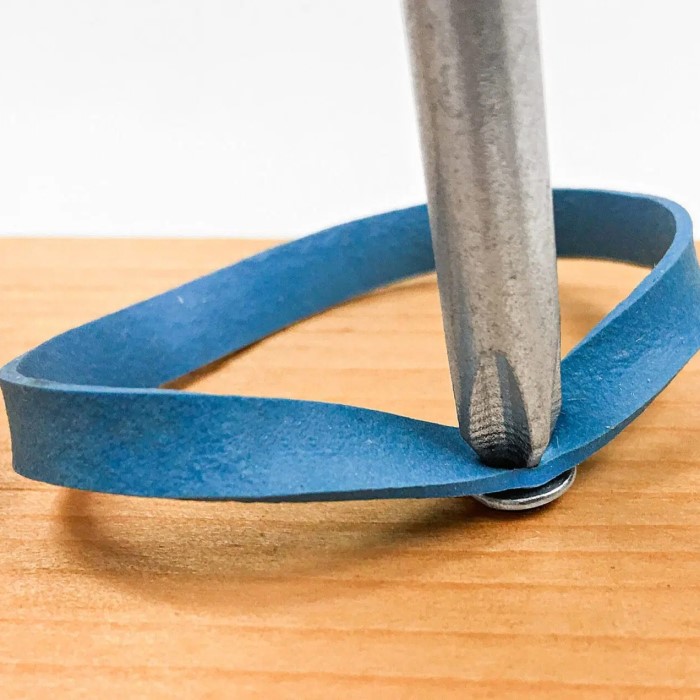
One of the most popular DIY hacks involves a simple rubber band. This method works best on screws that are only slightly stripped. It is an easy and affordable first step. First, find a wide rubber band. A standard office rubber band works well. You should avoid thin bands that snap easily. Next, place the rubber band over the screw head. Cover the stripped area completely. Then, take your screwdriver. Press the tip of the screwdriver through the rubber band. You must push it firmly into the screw head. The rubber band acts as a filler. It occupies the empty space created by the stripping. Moreover, it provides extra grip. The friction between the rubber and the metal is significant.
This friction allows the driver to catch the remaining edges. Attempt to turn the screw slowly. Do not rush the process. If you turn too quickly, the rubber might slip. Apply steady downward pressure. You should feel the screw begin to loosen. If it works, continue turning until the screw is out. However, this method has limitations. It rarely works on screws that are completely rounded out. The rubber band is simply not strong enough for severe damage. It also works better with manual screwdrivers than drills. A drill can tear the rubber band instantly. Therefore, stick to hand tools for this specific trick. If the rubber band shreds, try a fresh piece. Sometimes, you need a few attempts to get the right grip. This technique is a great starting point. It saves you from using more abrasive methods.
Using Pliers for Exposed Heads
How to remove a stripped screw? Sometimes, the screw head is not flush with the surface. If the head protrudes even slightly, pliers are your best friend. This method bypasses the stripped drive recess entirely. It relies on gripping the outer edges of the screw head. First, assess how much of the head is exposed. You need enough surface area for the pliers to grab. Locking pliers, often called Vise-Grips, are the most effective tool for this job. They clamp down with immense force. To begin, open the pliers jaws. Adjust the screw on the handle to set the width. You want the jaws to clamp tightly on the screw head. Place the pliers around the head. Lock the handle. The tool should bite into the metal. If it slips, tighten the adjustment screw further.
Once the pliers are locked on, you can begin turning. Grip the handle firmly. Turn the pliers counter-clockwise to loosen the screw. The advantage of locking pliers is the constant pressure. You do not need to squeeze while turning. This allows you to focus entirely on the twisting motion. If you do not have locking pliers, standard slip-joint pliers can work. However, they require more hand strength. You must squeeze and turn simultaneously. This can be tiring. Needle-nose pliers are useful for very small screw heads. They offer precision but less leverage. Regardless of the plier type, the goal is the same. You transfer the torque to the outer rim of the screw. This method is highly effective. It causes no damage to the surrounding material. Consequently, it is often the safest option for wood surfaces.
The Impact Driver Method
For stubborn screws that refuse to budge, an impact driver is a game-changer. This tool is different from a standard drill. It delivers rotational force in quick, powerful bursts. This action helps break loose stuck screws. There are two types: manual impact drivers and powered impact drivers. A manual impact driver is a simple, heavy-duty tool. You insert a bit into the end and place it in the screw head. Then, you strike the top of the tool with a hammer. The internal mechanism converts the hammer blow into rotational torque. This simultaneous downward and turning force drives the screw out. It is extremely effective for rusted or painted-over screws. On the other hand, powered impact drivers use a battery and motor.
They are louder than drills but much more efficient. To use one, select a high-quality bit. It must fit the screw head perfectly. Apply maximum pressure pushing into the screw. Start the tool on a low speed setting. The impact mechanism will engage. The bursts of power often shock the screw loose. However, you must be careful with powered impact drivers. If the screw is very soft, the impact might strip the head further. Therefore, steady pressure is vital. Do not let the tool wobble. If the bit slips, it will ruin the head instantly. This method is fantastic for construction and heavy-duty repairs. It provides the necessary force that a manual screwdriver cannot generate. If you plan to do many DIY projects, investing in an impact driver is wise.
Drilling and Using Screw Extractors
When other methods fail, a screw extractor is the definitive solution. This method involves drilling into the screw. It requires precision and patience. You will need a drill, specific drill bits, and a screw extractor kit. First, you must create a pilot hole in the center of the screw head. Use a punch to mark the center spot. This prevents the drill bit from wandering. Select a small metal drill bit. The bit should be smaller than the screw’s shank. Drill slowly into the screw head. Do not drill too deep. You only need a hole deep enough for the extractor. This is usually about 1/8 to 1/4 inch. Drilling also heats the screw. This heat can help break the bond caused by rust. After drilling the pilot hole, switch to the screw extractor.
The extractor looks like a drill bit with reverse threads. Insert the extractor into the hole you just drilled. Tap it gently with a hammer to seat it firmly. Then, use a wrench or a drill in reverse mode. Turn the extractor counter-clockwise. As you turn, the extractor digs into the soft metal of the screw. It bites into the walls of the pilot hole. Eventually, the gripping force exceeds the friction holding the screw. The screw will begin to back out. You must apply steady upward pressure while turning. This ensures the extractor stays seated. If the extractor breaks inside the screw, the problem becomes much worse. Therefore, work slowly and carefully. This technique is reliable for even the most damaged screws. It is the professional’s choice for removal.
Creating a New Slot with a Rotary Tool
How to remove a stripped screw? If you have a rotary tool, like a Dremel, you can reshape the screw head. This technique is effective but requires a steady hand. Essentially, you cut a new groove into the screw head. You turn a Phillips head screw into a flat head screw. First, equip your rotary tool with a cutting wheel. The wheel should be designed for cutting metal. Put on your safety glasses. Metal sparks will fly during this process. Secure the workpiece if possible. Start the tool and let it reach full speed. Gently lower the cutting wheel onto the screw head. Cut a straight, deep slot across the diameter of the head. This slot acts as the new drive for a flat-head screwdriver. The slot needs to be deep enough for the driver to grip.
However, do not cut deeper than the head itself. You risk damaging the surrounding material. Once the slot is cut, remove the tool. Take a large flat-head screwdriver. Insert it into the new slot. Apply downward pressure and turn counter-clockwise. The new slot provides fresh, square edges for leverage. This method works very well for screws with completely stripped Phillips heads. It removes the damaged metal and creates a new interface for torque. However, caution is necessary. The cutting wheel is sharp and fast. It can easily slip and cut the surrounding surface. To avoid this, move slowly and deliberately. If you are not comfortable using a rotary tool, practice on a scrap piece first. This is a destructive method for the screw, but it saves your project.
Prevention and Best Practices
How to remove a stripped screw? Preventing a stripped screw is always easier than removing one. You can save yourself hours of frustration by adopting good habits. First, always use the correct size driver. For Phillips head screws, the fit should be snug. If the driver wobbles in the head, the size is likely wrong. Test a few different bits to find the best match. Second, inspect your tools before use. Worn-out bits are a leading cause of stripping. If the tip looks rounded or worn, throw it away. New bits are inexpensive compared to the cost of fixing a stripped screw. Third, control your drill speed. Start slowly to establish a good grip. Then, increase speed only if necessary. If you feel the bit slipping, stop immediately.

Do not try to power through it. Instead, reverse the drill and reset the bit. Slipping is the enemy of screw heads. Fourth, apply ” inward” pressure. This means pushing the drill or screwdriver into the screw. You want the bit to stay fully seated. Lack of pressure causes the bit to ride up and strip the head. Additionally, consider the material you are screwing into. Hardwoods like oak or maple require pilot holes. Drilling a pilot hole relieves the pressure on the screw. It makes driving easier and prevents the screw from seizing. Finally, if a screw feels too tight, back it out slightly. Then, drive it in again. This “back and forth” motion helps clear the threads. By following these simple guidelines, you drastically reduce the risk of stripping. Good technique is the best tool you have.
FAQ: Answering Your Top Questions
Many people face this issue and have specific questions. Here are answers to the most common queries regarding stripped screws.
What is the easiest way to remove a stripped screw?
The easiest method often depends on the situation. However, the rubber band trick is usually the simplest first step. It requires no special tools. If the head is exposed, using locking pliers is arguably the easiest and most reliable method. It provides a strong mechanical grip.
Can a rubber band really remove a stripped screw?
Yes, a rubber band can work. It acts as a buffer to fill the stripped gaps in the screw head. This provides extra friction for the screwdriver to grip. However, this method only works on lightly stripped screws. It is less effective on completely rounded heads.
What to do if I cannot unscrew a screw?
If basic methods fail, you need to change the strategy. Try using an impact driver to break the tension. Alternatively, drill a small hole in the screw head and use a screw extractor. As a last resort, cut a new slot with a rotary tool.
How to unscrew a stripped screw without a drill?
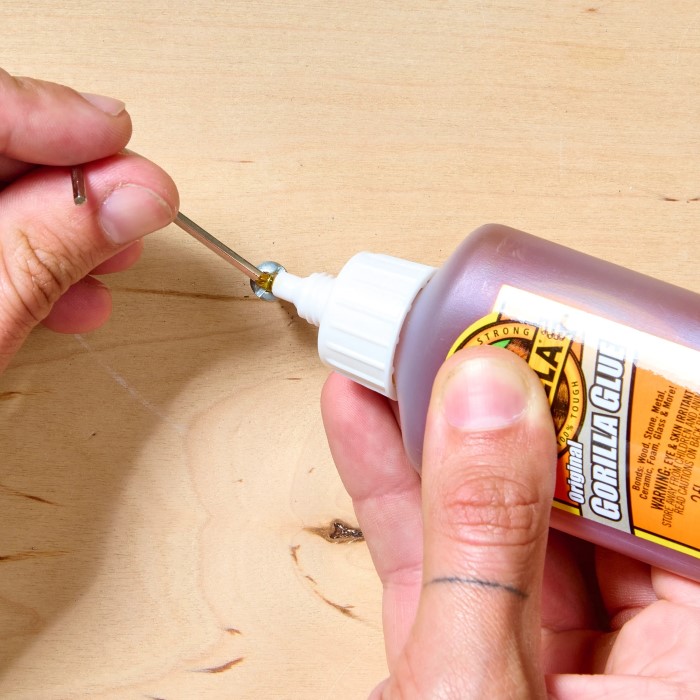
You can use the rubber band method with a manual screwdriver. Alternatively, if the head is raised, use locking pliers to twist it out. You can also try placing a steel wool pad or aluminum foil in the head for extra grip.
Conclusion
Dealing with a damaged fastener is a test of patience. Yet, it is a skill every DIYer must master. We have explored various techniques, from simple friction tricks to advanced extraction. The key is to stay calm and assess the damage. Start with the least invasive method, like the rubber band or pliers. If those fail, move on to drilling or using a rotary tool. Each method has its place depending on the severity of the damage. Remember that prevention is always your best line of defense.
Using the right tools and correct pressure will save you time in the future. By following this guide, you now know how to remove a stripped screw like a professional. Your projects no longer need to stall because of one stubborn piece of metal. Keep these tips in your mental toolbox. You will be ready for any screw that tries to stand in your way.