
The Anatomy of a Saw Blade
To choose the right blade, you must understand its parts. It is not just a spinning disc of metal. Every feature serves a specific purpose. The most obvious part is the plate or body. This provides the structure. It must be rigid to prevent wobbling. Consequently, a cheap blade often vibrates. This leads to inaccurate cuts. The most critical features are the teeth. These are the cutting edges. They come in various shapes and sizes. Additionally, the gullets are crucial. These are the valleys between the teeth. They allow sawdust to escape. If the gullets are too small, the saw will burn the wood. Furthermore, the hook angle is important. This is the angle of the tooth face. A positive hook angle cuts aggressively. It is good for ripping. A negative hook angle is less aggressive. It is better for cutting metal or miter saws. Therefore, understanding the circular saw guide helps you read the blade. You will know what to look for on the packaging. Consequently, you avoid buying the wrong tool. This knowledge is the foundation of your selection process.
- The Plate: High-quality plates are laser-cut and tensioned. They remain stable under high heat. Cheaper plates are often stamped. They can warp easily.
- The Teeth: The material matters. Most modern blades use carbide tips. These stay sharp longer than steel.
- The Arbor: This is the hole in the center. It must match your saw’s shaft size. Standard sizes are usually 5/8 inches.
- Expansion Slots: These are laser-cut lines on the plate. They allow the metal to expand as it heats up. This prevents the blade from warping during heavy use.
Understanding Tooth Count (TPI)
The number of teeth on a blade determines the cut quality. This count is often referred to as TPI (Teeth Per Inch). It is the most significant factor in your decision. Generally, fewer teeth mean faster cuts. However, faster cuts are often rougher. Conversely, more teeth result in smoother cuts. But the feed rate is slower. Therefore, you must balance speed and finish quality.
- Low Tooth Count (10-24 teeth): These blades are for ripping. They remove material quickly. They have large gullets to clear big chips. However, they leave a rough edge. This requires sanding later. Use these for construction framing.
- Medium Tooth Count (40-60 teeth): These are general-purpose blades. They work well for both ripping and crosscutting. They offer a good compromise. The finish is decent but not perfect. Therefore, they are great for job site work.
- High Tooth Count (80+ teeth): These blades are for finishing. They produce glass-smooth edges. They are ideal for plywood and MDF. They cut slowly but precisely. Use these for cabinetry and furniture.
Moreover, consider the material you are cutting. Thick hardwood requires fewer teeth for efficient removal. Thin veneers require many teeth to prevent splintering. Consequently, a single blade cannot do it all. Many woodworkers own two or three different blades. They swap them based on the task. This system ensures the best result for every project. Understanding TPI prevents tear-out. It saves your expensive lumber from ruin.
Ripping vs. Crosscutting Blades
Wood has a grain direction. Cutting with the grain is ripping. Cutting across the grain is crosscutting. These two actions require different blade geometries. Using the wrong blade leads to poor results. Therefore, distinguishing between them is vital. A ripping blade has fewer teeth. Usually, it has about 24 teeth. The teeth are flat-topped. This design acts like a chisel. It scoops out wood fibers aggressively. Consequently, it powers through long cuts.
- Ripping Blades: They cut fast. The gullets are deep. This allows for heavy chip removal. However, the cut surface is rough. It needs smoothing with a planer or sander.
- Crosscutting Blades: These have more teeth, often 60 to 80. The teeth are angled or beveled. This design slices through the wood fibers like a knife. It prevents the wood from tearing out at the edges.
- Combination Blades: Can you use one blade for both? Yes, combination blades exist. They have groups of teeth separated by large gullets. They are versatile. However, they do not rip as fast as rip blades. They do not crosscut as smoothly as crosscut blades.
Furthermore, identify the direction of your cut. Look at the wood grain. If you are cutting a 4×8 sheet along the length, you are ripping. Use a rip blade or general blade. If you are cutting a sheet to length, you are crosscutting. Use a high-tooth count blade. This distinction protects your workpiece. It also extends the life of your saw. A ripping blade used for crosscutting will tear the wood fibers. A crosscut blade used for ripping will burn the wood. Therefore, choose wisely for every cut.
Specialized Blades for Different Materials
Wood is not the only material you might cut. Circular saws are powerful enough for other substances. However, you need specific blades. Using a wood blade on metal destroys the blade instantly. It is also dangerous. Therefore, always match the blade to the material.
- Plywood and Laminate Blades: These materials splinter easily. Therefore, you need a blade with many teeth. Some have 100 or more teeth. They make ultra-clean cuts. Some even have a special grinding design to minimize tear-out.
- Metal Cutting Blades: These blades use a different material. They often have carbide teeth designed for non-ferrous metals or steel. They cut cool and clean. Never use a wood blade for this purpose.
- Masonry and Diamond Blades: For cutting concrete or brick, use a diamond blade. It does not have “teeth” in the traditional sense. It has a segmented rim of industrial diamonds. It grinds the material away.
- Plastic and PVC: Cutting plastic requires a fine-tooth blade. It melts easily. Therefore, the blade must cut cool. A blade with 60 to 80 teeth usually works well.
Furthermore, consider the safety aspect. Metal and masonry cutting create different types of debris. Hot sparks and metal shards can ignite sawdust. Therefore, clean your saw thoroughly after cutting these materials. Always wear the correct safety gear. Eye protection is mandatory. Ear protection is also recommended. Specialized blades make the saw a multi-purpose tool. They expand your capabilities beyond woodworking.
Blade Quality and Coatings
Price often reflects quality in saw blades. Cheap blades are made from softer steel. They dull quickly. They also tend to wobble. Consequently, they produce rough cuts. Investing in a high-quality blade saves money in the long run. It reduces waste and frustration. High-quality blades use better carbide. The carbide tips are larger. This allows for more sharpenings. Therefore, the blade lasts years longer.
- Carbide Quality: Not all carbide is the same. Micro-grain carbide is harder. It holds an edge longer. It provides a sharper cut.
- Anti-Friction Coatings: Many premium blades have coatings. Teflon or epoxy coatings reduce friction. This prevents pitch and resin buildup. The blade runs cooler and quieter.
- Anti-Vibration Slots: High-end blades have sophisticated slot designs. They dampen noise and vibration. This results in a smoother cut.
- Laser-Cut Arbors: Cheap blades have punched arbors. This can cause the blade to be slightly off-center. Laser-cut arbors ensure a perfect fit. The blade spins true.
Moreover, maintenance is easier with coated blades. Pitch buildup creates drag. It also burns the wood. A quick wipe with a cleaner restores the blade. Therefore, look for these features when shopping. Do not just look at the price tag. The cut quality is also vastly superior. Your projects will look more professional. This is the mark of a serious woodworker.
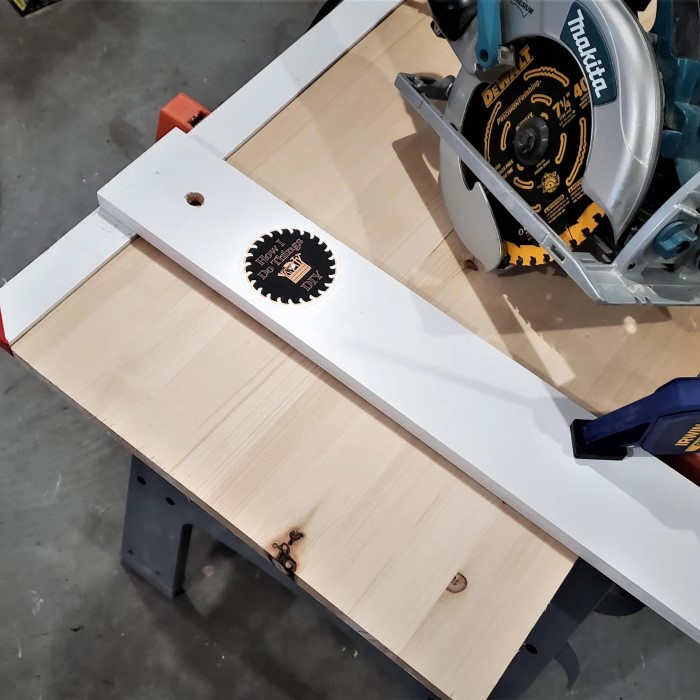
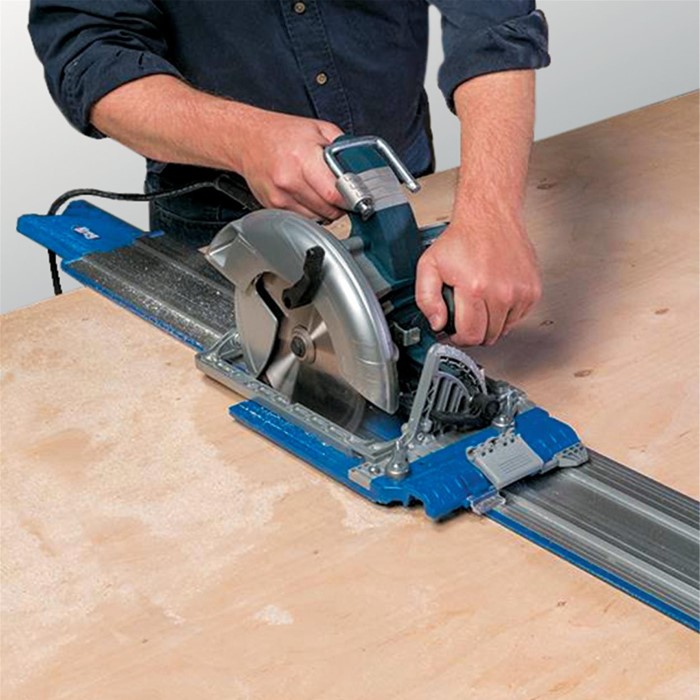
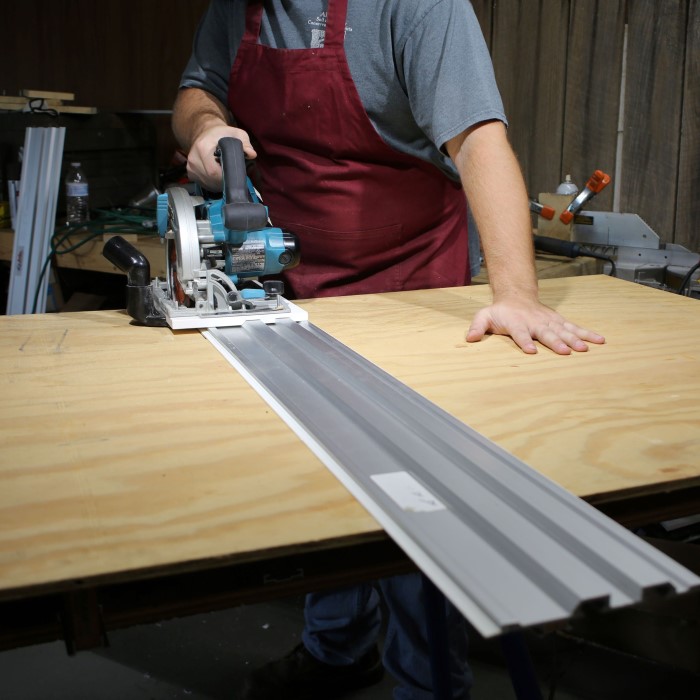
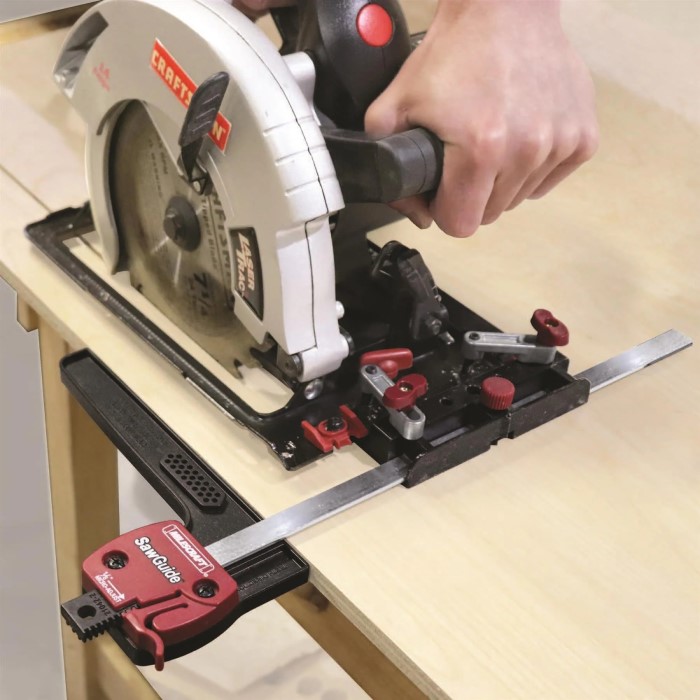
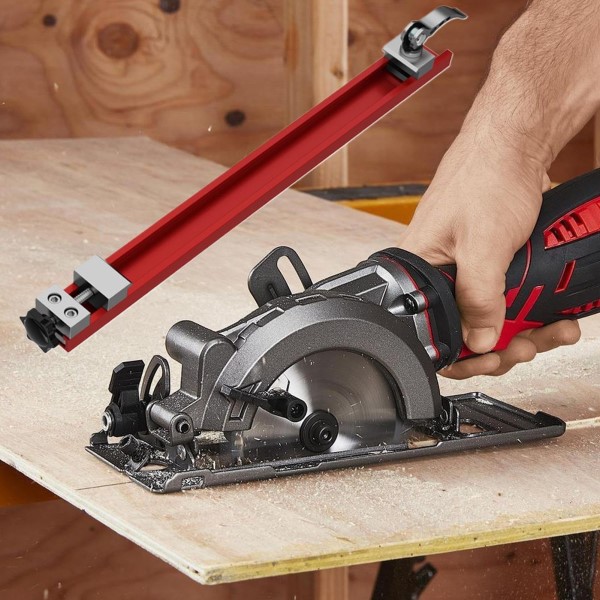
The Importance of a Straight Edge Guide
Even the best blade needs direction. A circular saw is a freehand tool by design. However, freehand cuts are rarely straight. Human error is inevitable. Therefore, a guiding system is essential. This is where a physical guide comes in. You might clamp a straight piece of wood to the workpiece. The saw base rides against this edge. This ensures a perfectly straight line. Consequently, the blade performs at its best.
- Circular Saw Guide Rails: These are aftermarket accessories. They are long aluminum extrusions. They have a non-slip bottom. They act like a track saw. You simply clamp them down.
- DIY Straight Edges: You can make your own. Use a sheet of plywood. Glue a fence on top. Cut off the excess. This creates a custom guide for your specific saw.
- Speed Squares: For short crosscuts, a speed square is excellent. You can clamp it to the board. It acts as a fence for the saw base. This is fast and accurate.
Furthermore, using a guide improves safety. It prevents the saw from binding. Binding causes kickback. Kickback is dangerous. A straight circular saw guide keeps the blade moving forward smoothly. It reduces the strain on the motor. It also reduces the heat generated. Therefore, the blade stays sharper longer. Whether you buy a commercial circular saw guide or make one, it is a necessary tool. It bridges the gap between rough carpentry and fine woodworking. It turns a basic saw into a precision instrument.
Safety and Maintenance Tips
Using a circular saw requires respect. The blade spins at thousands of RPMs. It can cause serious injury. Therefore, safety must always be the priority. Before changing a blade, unplug the saw. Never rely on the switch alone. Verify the power is disconnected. Furthermore, check the blade before every use. Look for damaged or missing teeth. A damaged blade is a safety hazard.
- Proper Installation: Ensure the blade faces the right direction. The arrow on the blade must match the arrow on the saw. Tighten the arbor nut securely. A loose blade can fly off.
- Correct Depth Setting: Set the blade depth correctly. The teeth should clear the material by about a quarter inch. Too much blade exposed is dangerous. It also reduces cut quality.
- Cleaning: Pitch builds up on the blade. Use a specialized cleaner or oven cleaner. Scrub with a nylon brush. A clean blade cuts better and cooler.
- Sharpening: Do not throw away a dull carbide blade. It can be sharpened. Find a local sharpening service. It costs a fraction of a new blade.
Moreover, listen to the saw. A struggling motor indicates a dull blade. Forcing a dull blade burns the wood. It also burns out the motor. Stop and check the blade immediately. Regular maintenance extends the life of your tools. It also ensures your safety. A sharp blade is safer than a dull one. It requires less force to cut. Less force means more control. Therefore, keep your blades sharp and clean.
FAQ: Your Questions Answered
Are circular saw guides worth it?
Yes, they are absolutely worth the investment. They also improve safety by preventing kickback. Therefore, they are essential for quality work.
Can you make your own circular saw guide?
Yes, you can easily make one. You need a straight piece of plywood or MDF. Glue a fence strip on top. Run your saw against the fence to trim the edge. Now you have a custom guide.
What destroys a saw?
Several things destroy a saw. Using the wrong blade for the material causes overheating. Cutting nails or screws ruins the blade instantly. Forcing the saw strains the motor. Lack of cleaning causes pitch buildup. This leads to rust and friction.
Can you turn a normal circular saw into a track saw?
Yes, you can. You can purchase universal guide rail adapters. Or, you can build a DIY track saw jig. It allows you to make precise, splinter-free cuts. It saves you money compared to buying a dedicated track saw.
Conclusion
Selecting the right blade is a fundamental skill. It distinguishes a novice from a professional. You now understand tooth counts. You know the difference between ripping and crosscutting. Furthermore, you recognize the value of blade quality. A high-quality blade makes your work easier. It produces cleaner results. Do not forget the importance of a stable platform. Using a circular saw guide ensures your cuts are true. Combine the right blade with a circular saw guide for perfection. Your projects will improve immediately. Remember to prioritize safety above all else. Maintain your tools well. They will serve you for years to come. Next time you start a project, take a moment to choose your blade. Your finished work will thank you.